
The open E minor Pentatonic is one of the scales I find the most valuable to learn as a beginner. It’s a very common and versatile scale used for solos, riffs and licks. it’s easy to remember, an invaluable shape to know. It can help develop your fretboard and theory knowledge, your finger coordination and pattern building.
It’s the perfect place to start training your ears to the sound of the minor pentatonic. Today I’ll show the scale and 5 exercises you can use to drill the pattern into your fingers..
What is (E Minor) Pentatonic Scale?
The following image shows the notation and tab for a 2 Octave E Minor Pentatonic Scale in the first position. It has an additional G (b3) note on the end to extend the scale. This is the most common version you will see as a guitarist. The Scale below is ascending, this means going up in pitch. We will also play the scale descending (coming back to the start note, down in pitch).

The open position E minor Pentatonic incorporates open strings and fretted notes. It’ a familiar part of the fretboard if you’re used to strumming open chords.
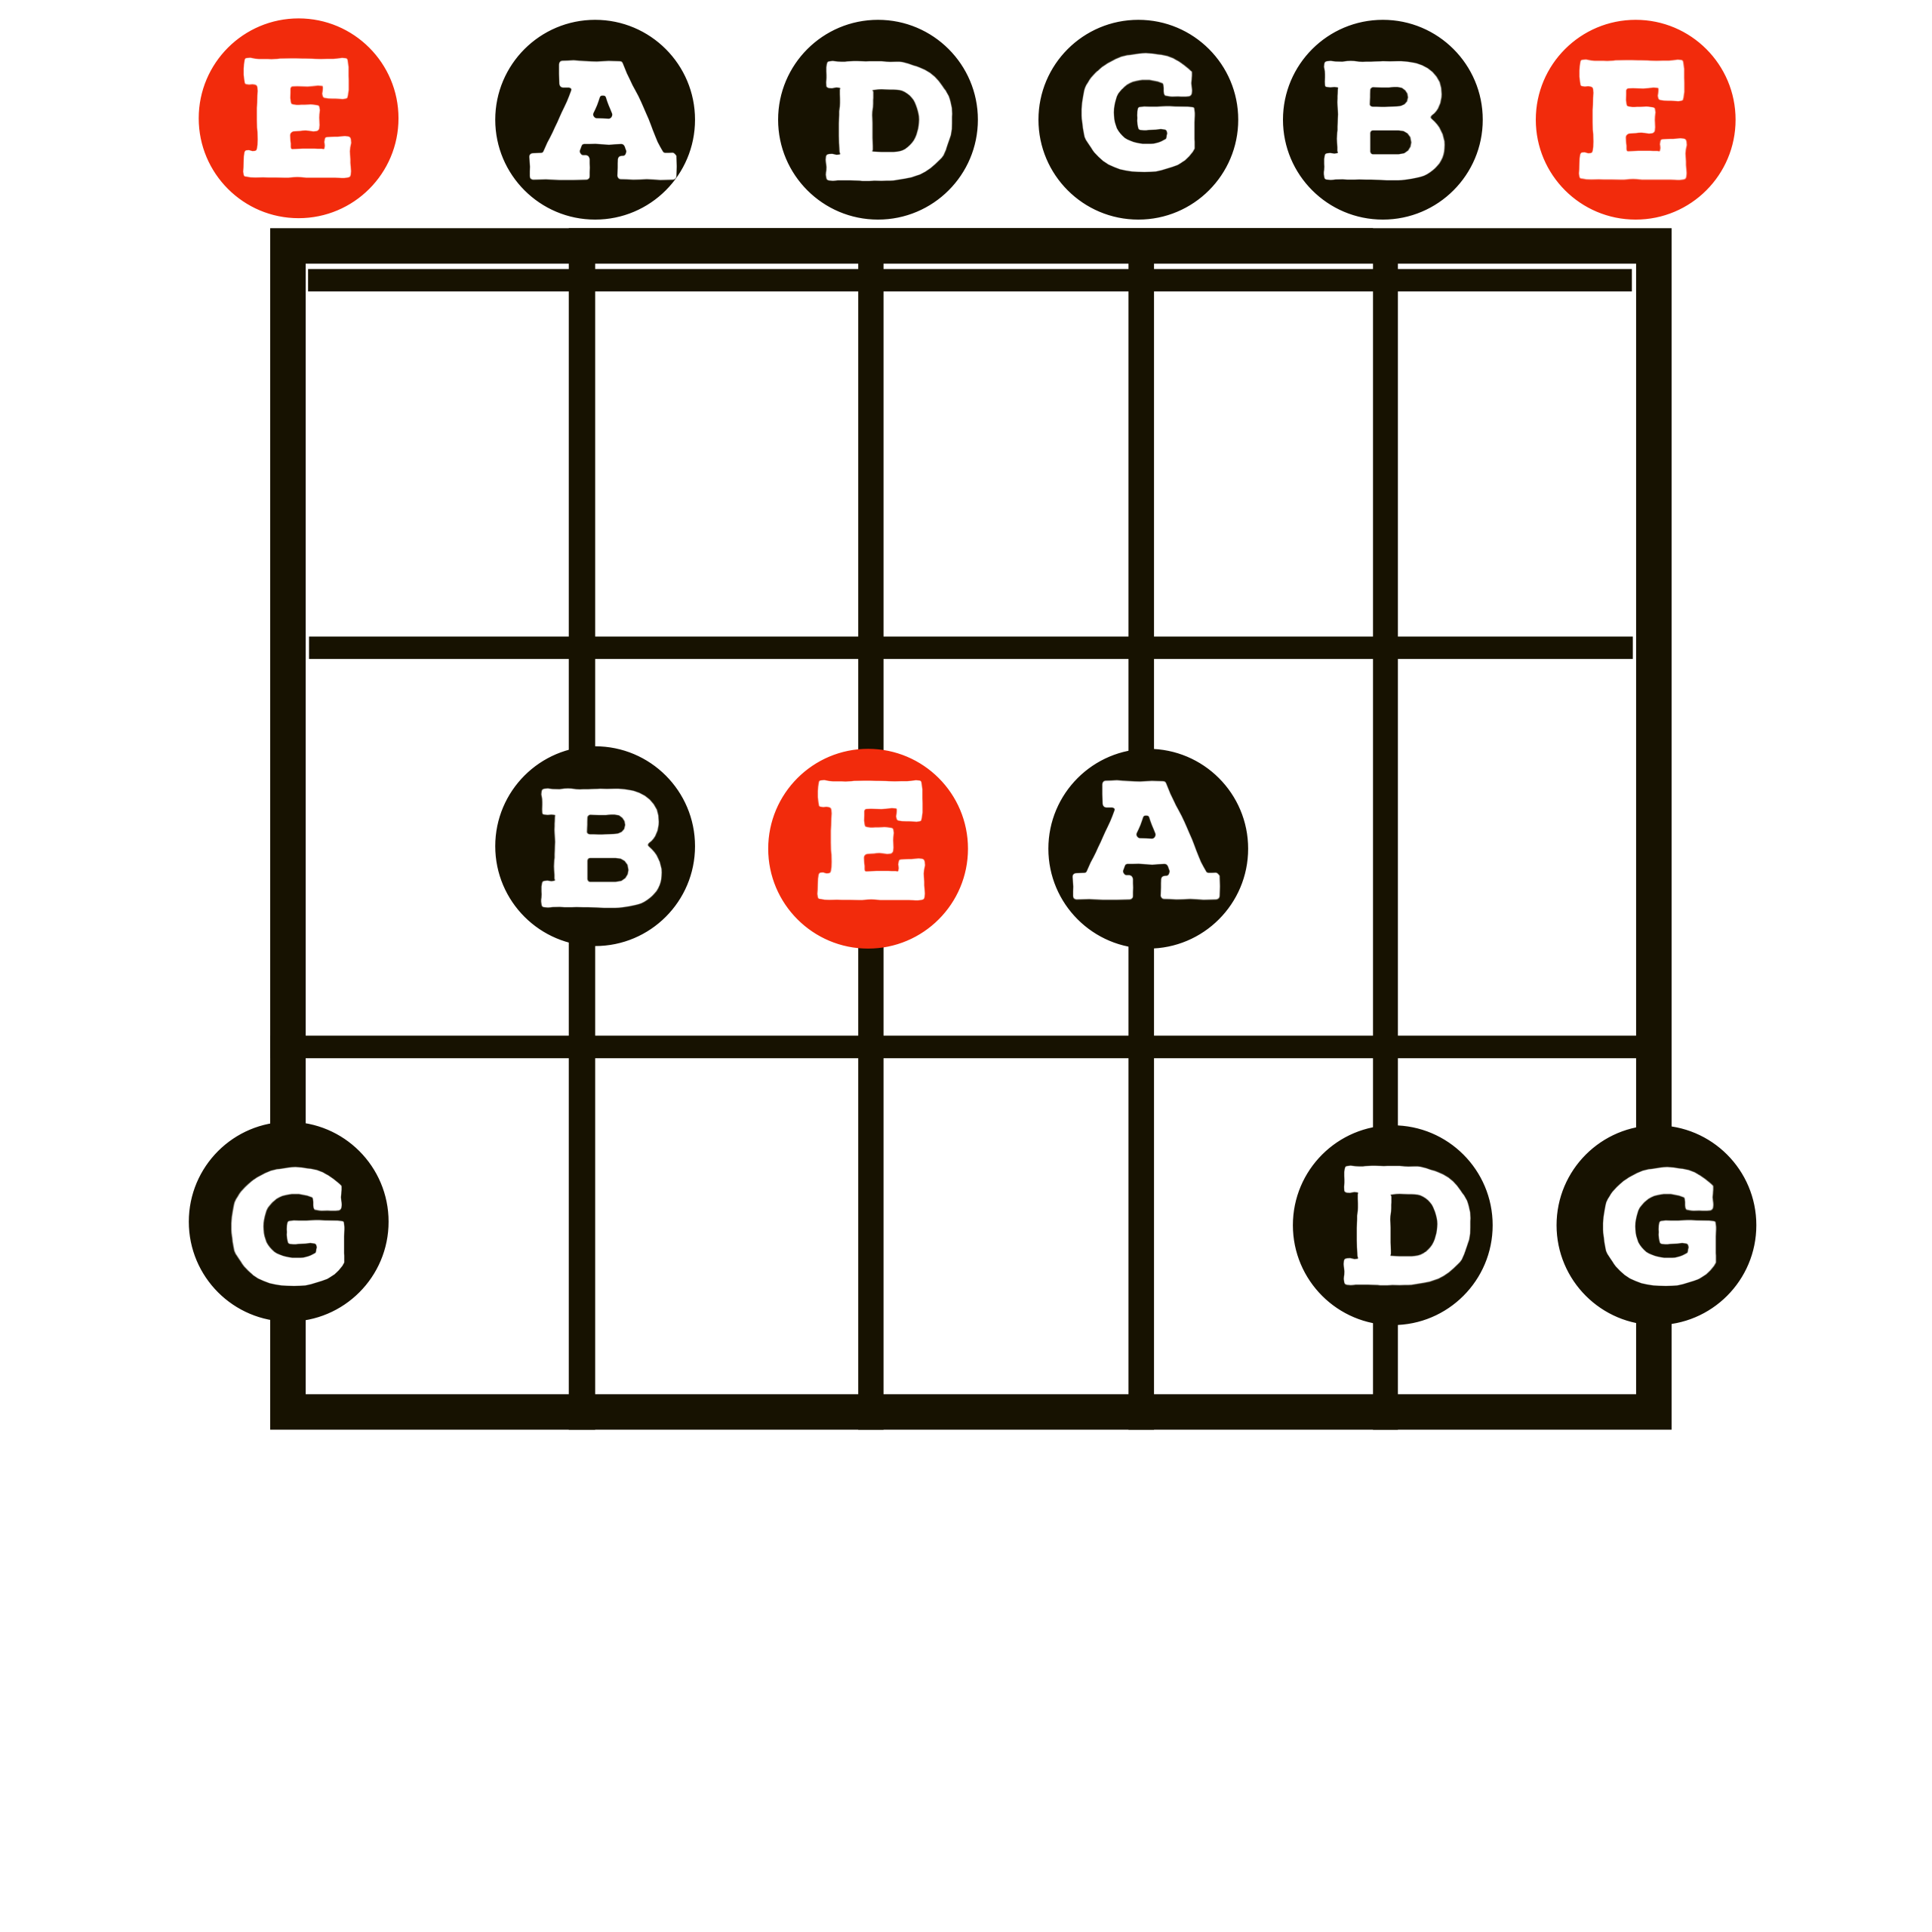
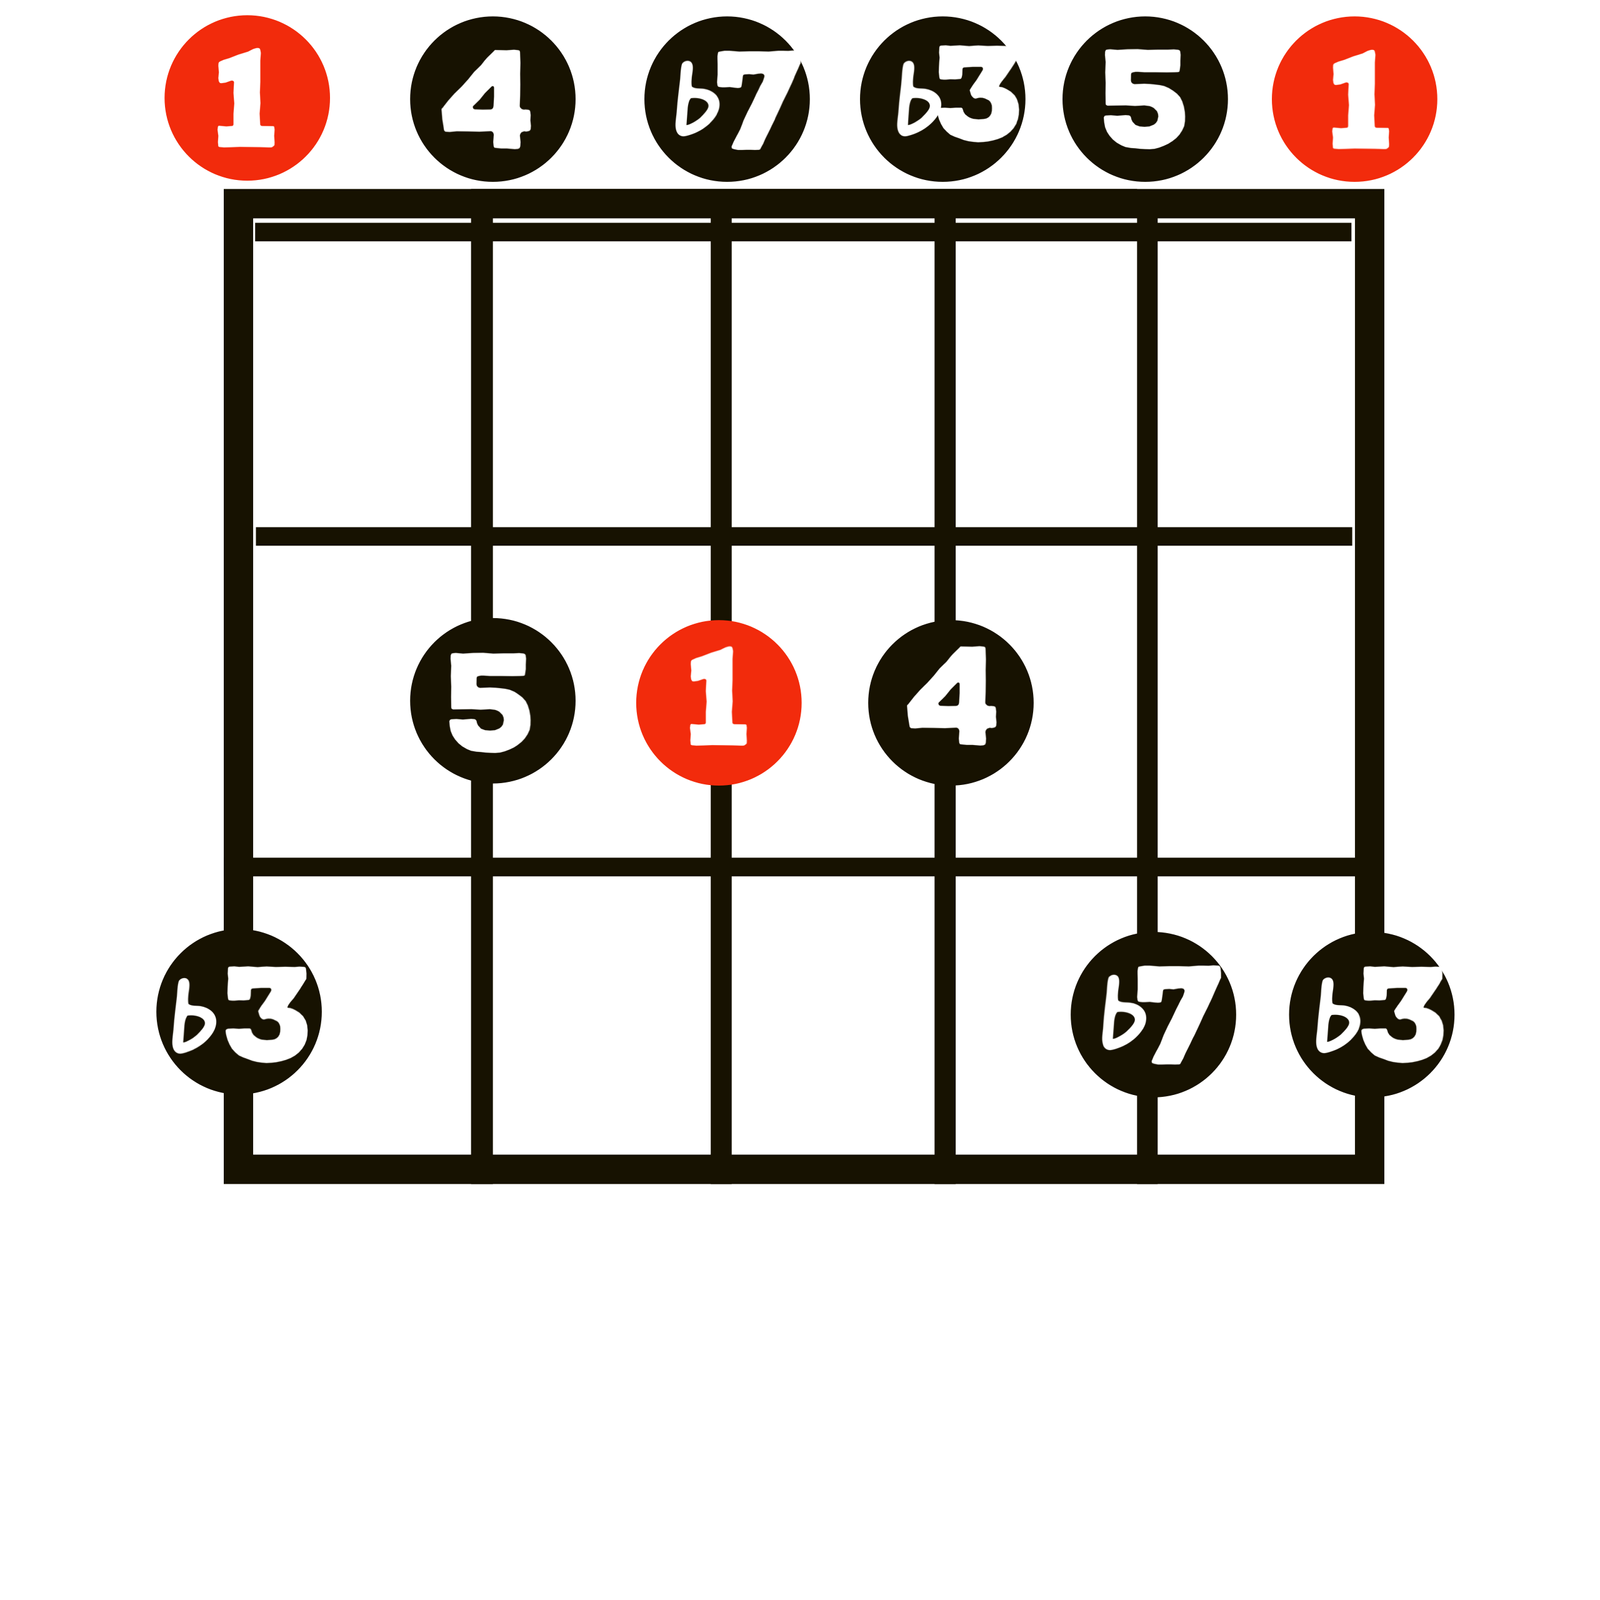
The first image below shows the scale pattern on the guitar neck of what you see in the image above. The red dots are the root notes, (first note of the scale) in this case ‘E’. The next image shows you the notes in each degree of the scale.

A bit of theory introduction to Pentatonic…
The pentatonic minor scale consists of 5 notes (penta = 5) taken from the Natural Minor scale which has 7 notes (8 including the octave). We drop 2 notes from the Natural Minor scale (degrees 2 & 6). The Minor Pentatonic has a formula associated with it – 1 b3 4 5 b7 8ve (1). This is shown in the scale diagram below. We’ll dig deeper into this in a future more Theory-based lesson.
Today we’re playing 2 octaves. We’ll be repeating the sequence of notes from E to E (1 Octave) and then on again to the next E for the second octave. (E G A B D E G A B D E G). We have an additional G on the end, remember.
What are Scales and Why do we learn them?
Scales are part of the language of music. Building blocks out of which we can craft riffs, solos, melodies: We learn the scales, the sound of the scales and shape of the scales. Once we’ve done that we can then put them to work..
Today is about creating a foundation. We do this by drilling shapes into our fingers. Below are 4 exercises to help you do just this. We do these exercises initially to get your fingers prepped, primed and ready for building the scale into something more musical and expressive. You need to know the shape inside out if you want to use it more lyrically. Here are 4 ways you can do this:
5 Exercises to build your patterns and fingers and make this shape second nature : Play all of the exercises Ascending & Descending.
1. DOWN PICKS – We start by playing the scale with down picks using your pick or thumb. Firstly we play it ascending (playing it one way increasing in pitch) and then descending (playing it from the end back to the beginning). Focus on clean notes, even picks and even distance between each note.
2. ALTERNATE PICKS – Play the scale ascending and descending but this time make sure each time you alternate your pick direction from one note to the next. Start on a ‘down’ pick, your second note will be an ‘up’ pick etc… ‘ Make sure your down and up picks are the same volume to begin with. This exercise will help you to build your consistency and confidence at playing clean and even up picks. It will also help you to build speed. Its much quicker to play strings with alternate picking than it is to play all down, or all up strokes.
The next 3 exercises are a bit more challenging so wait until you have mastered the first 2 before you move on.
3. HAMMER ONS – Hammer on technique is a very common technique that involves forcibly tapping your finger onto the string (with your fretting hand) to create a second note ringing out. Here is a video link to a lesson I recently did demonstrating how to play hammer ons.

4. 3s – Play the scale in groups of 3s. This is tabbed out below.

5. String Skip – This is tabbed out below. Remember to play the scale in reverse too.

Practise Tips:
- Once you have one or two of the above exercises under your fingers start to bring in a Metronome at a reasonable speed so you can practise your timing and also playing along to something external from yourself – don’t rush. It’s about accuracy more than speed. Speed is great if it sounds good.
- To get a really basic feel for the sound: Find an E minor backing track online and practise playing the scale along to it. Play the scale up and down, play the exercises. This will train your ears to hear how the scale and chords work together is a basic way.
Next steps…..?
Making the scale more musical and building expression. In order to do that we have to use it.
Ways you can start to build this are: Listening, learning and working out licks, songs, riffs and solos that use the E Minor Pentatonic scale. Start by learning a riff maybe ( Play that Funky Music is a great start), Are you gonna go my way by Lenny Kravitz too. Listen to the techniques, are there bends, slides, vibrato etc? You can also start to jumble the notes in the scale up and get creative, try to create a simple melody this way.
That should be enough to keep you working for a bit!
VIDEO LINK TO FULL LESSON ON E MINOR PENTATONIC
Enjoy your journey into scales and expressive playing, remember it’s the leg work and a good foundation that will help you to become more fluent.
See you next time
Jo
Thank you
You are very welcome! 🙏